
How to Build a Raised Vege Garden: Step-by-Step NZ Guide
There's something deeply satisfying about growing your own food. But if you've tried and found yourself battling slugs, waterlogged soil, or a dog with a taste for lettuce, you're not alone. Knowing how to build a raised vege garden properly makes all the difference and in New Zealand's variable climate, the details really do matter.
This guide walks you through everything you need to consider, from choosing the right materials to protecting your crops year-round.
Why Raised Garden Beds Work So Well in New Zealand
New Zealand's weather is unpredictable. One week it's glorious, the next you're watching your silverbeet drown. Raised garden beds give you control that in-ground growing simply can't match.
Raising your growing area improves drainage immediately. Roots stay healthy. Soil warms faster in spring, which means earlier planting and a longer season.
You also get to choose exactly what goes into your soil mix - no clay, no compaction, no guesswork. It's growing on your terms.

What You'll Need Before You Start
Getting the basics right from the start saves a lot of frustration later. Here's what to think through before you build or buy.
Size and height.
Aim for a bed no wider than 1.2 metres so you can reach the centre from either side without stepping in. A height of at least 30–40 cm gives roots room to grow and makes tending your garden much easier on your back.
Location.
Most vegetables need at least six to eight hours of direct sunlight daily. In New Zealand, a north-facing spot is the sunniest location for planting - the sun tracks across the north, so north-facing gardens receive direct sun throughout the day, including during the lower winter sun. East-facing gardens catch the morning sun, with shade gradually moving in through the afternoon. West-facing spots stay shaded in the morning, then receive afternoon sun. Whichever direction you choose, keep away from large trees that compete for moisture and nutrients.
Drainage.
Avoid placing beds in low-lying areas where water pools. Raise them on level ground and consider adding a layer of coarse gravel or pumice beneath your soil mix.
Choosing the Right Materials
This is where many gardeners make a mistake they regret later. The material you build from matters for both longevity and food safety.
Treated timber should be avoided in any bed where you're growing food. The chemicals used in treatment can leach into soil and, ultimately, into what you eat. It's not worth the risk.
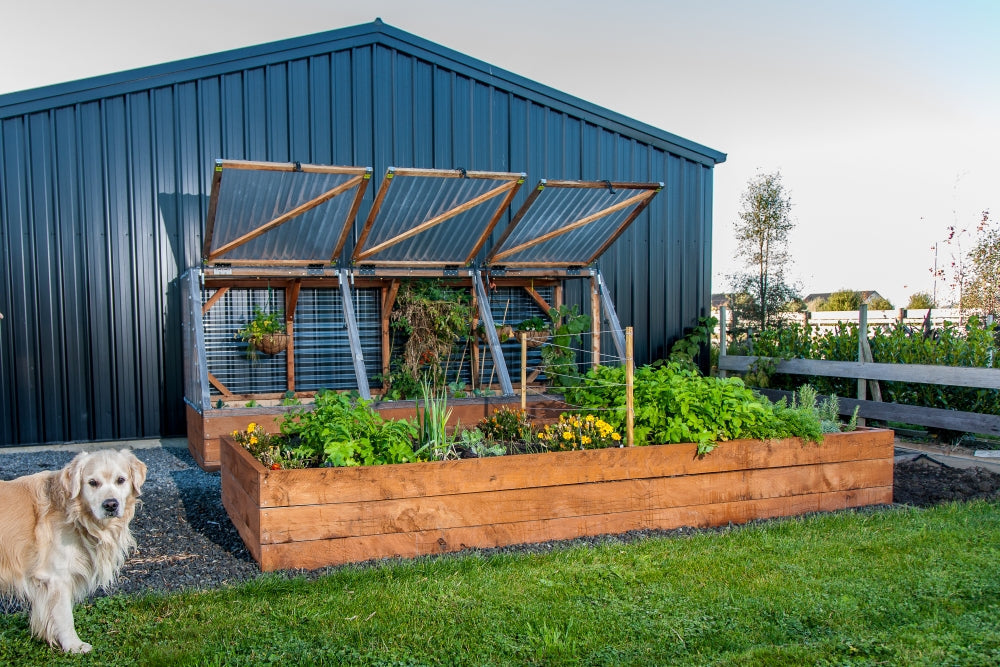
Untreated macrocarpa is the gold standard for NZ raised garden beds. It's naturally resistant to rot, incredibly durable, and completely food-safe. It looks beautiful too; the warm timber tones age well and suit most outdoor settings.
Avoid low-cost imported options that may not be built for NZ conditions or designed with food safety in mind. A bed that lasts two seasons is no bargain.

APT large garden bed pictured above
How to Build a Raised Vege Garden: The Step-by-Step
Prefer to watch rather than read? APT has a series of easy-to-follow assembly videos available on the APT website and YouTube channel that walk you through the build clearly, step by step. Worth watching before you get started.
Step 1 — Prepare your site.
Clear the area of weeds and grass. Lay cardboard or newspaper underneath to suppress weed growth.
Step 2 — Assemble your frame.
Secure your timber at the corners using stainless steel screws or brackets. Stainless steel is important because galvanised fixings can corrode over time and compromise the structure.
Step 3 — Fill with quality soil.
A good mix for raised beds is roughly 60% topsoil, 30% compost, and 10% pumice or coarse sand for drainage. Avoid using straight garden soil, which compacts quickly in a contained bed.
Step 4 — Plan your planting.
Group plants by water needs and sunlight. Taller plants like tomatoes or climbing beans should go at the back so they don't shade smaller crops.
Step 5 — Consider protection from the start.
Birds, slugs, cats, and unpredictable weather are the enemies of a productive garden. A canopy or frame above your bed can shield crops from rain, hail, and pests without needing ongoing intervention.
Step 6 — Water consistently.
Raised beds dry out faster than in-ground gardens. A consistent watering routine ideally early morning keeps your soil moisture even and your crops thriving.
Protecting Your Crops Year-Round
Building the bed is only half the job. Keeping it productive through autumn and winter is where most home gardeners lose momentum.
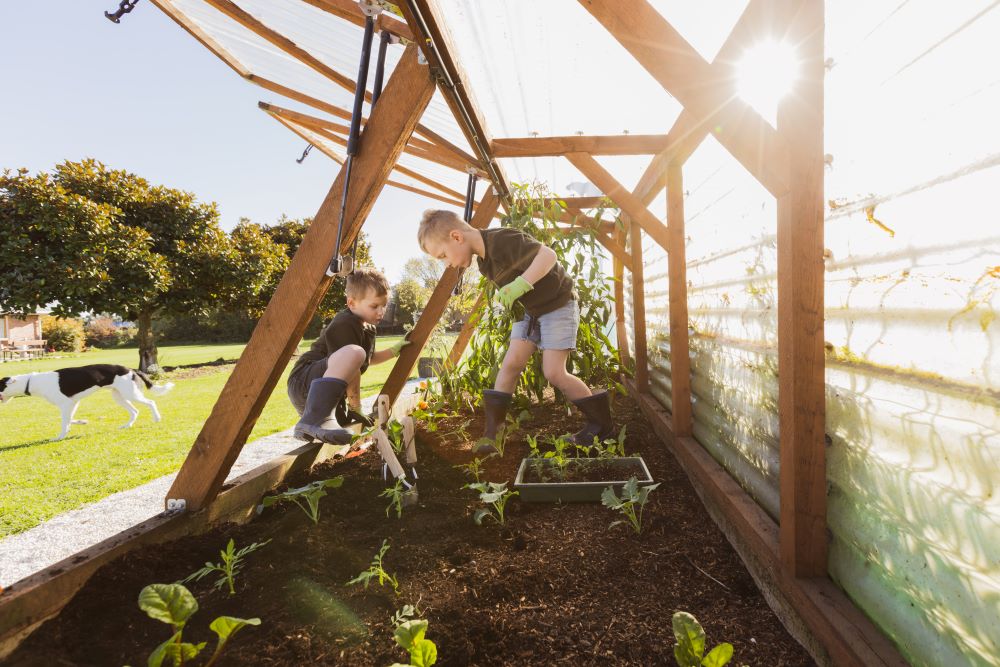
A covered canopy extends your growing season significantly. It keeps frosts off tender seedlings, reduces the impact of heavy rain on soil, and keeps birds and insects out without the need for chemicals. Spray-free growing becomes genuinely easy when the environment is controlled.
This is especially relevant in regions with harsh winters or high rainfall. Southland, Otago, Canterbury, West Coast and the Waikato are all beautiful places to live and difficult places to grow without some form of protection.

APT Garden Beds: Built to Make This Easier
If you'd rather skip the weekend building project and get straight to growing, APT raised garden beds are worth a look.
Assembly is straightforward too. APT's step-by-step video guides are available on the APT assembly page and YouTube clear, easy to follow, and designed to get you growing with no fuss.
APT beds are handcrafted in New Zealand from untreated macrocarpa, with stainless steel fixtures built to last. The canopy design is what sets them apart; it protects crops from pests, pets, rain, and frost, so you can grow spray-free vegetables year-round without the stress. Every detail has been considered - from the dimensions to the materials - so that the growing environment works for you rather than against you.
They're designed for NZ conditions because they're made here, by people who garden here. Available in a natural timber finish or a dark ebony stain, they sit neatly in any backyard — from a city villa to a rural lifestyle block.

Frequently Asked Questions
What's the best timber for a raised vege garden in NZ?
Untreated macrocarpa is ideal. It's naturally rot-resistant, food-safe, and well-suited to NZ's outdoor conditions. Avoid treated pine or imported timbers that may not be safe for edible gardens.
How deep should a raised garden bed be?
For most vegetables, 30–40 cm is sufficient. Root vegetables like carrots and parsnips do better with 45–60 cm of depth. Herbs and leafy greens can manage with as little as 20 cm.
Do I need to line my raised garden bed?
You don't have to, but lining the inside with geotextile fabric can help retain soil moisture and prevent the bed frame from soil contact which extends the life of your timber.
What do you put in the bottom of a raised vegetable bed?
Start with a layer of cardboard or newspaper to suppress weeds, then add coarse material like sticks, woody prunings, or pumice for drainage. Top that with a blend of compost and topsoil. This layered approach improves drainage, builds soil health over time, and stops weeds pushing up from below.
What is the lasagna method for raised beds?
The lasagna method (also called sheet mulching) involves layering organic materials directly in your bed alternating between "brown" carbon-rich layers (cardboard, dry leaves, straw) and "green" nitrogen-rich layers (grass clippings, kitchen scraps, fresh compost). You don't dig or turn it. Over time the layers break down into rich, workable soil. It's a low-effort, high-reward approach that's well suited to new beds being set up from scratch.
How to cheaply fill a raised planter bed?
Use the lasagna method to bulk out the lower portion of your bed with free or low-cost materials cardboard, grass clippings, leaves, prunings, and homemade compost. Reserve your quality bought topsoil and compost for the top 20–30 cm where roots do most of their work. This approach significantly reduces the volume of purchased soil you need without compromising growing performance.
Can I fill my raised garden bed with just soil?
You can, but it's not the best approach. Straight garden soil compacts quickly in a raised bed, reduces drainage, and depletes nutrients faster. A mix of topsoil, compost, and a free-draining material like pumice or coarse sand performs much better. Aim for roughly 60% topsoil, 30% compost, and 10% pumice as a starting point.
Can you put grass clippings in the bottom of a raised bed?
Yes grass clippings make a useful green layer in a lasagna-style fill. They break down relatively quickly and add nitrogen to the soil. Avoid using clippings from lawns that have been sprayed with herbicides or pesticides, as these can affect your crops. Apply in thin layers rather than a thick clump, which can mat and restrict airflow.
Should I remove the grass under a raised garden bed?
You don't have to. Laying thick cardboard or several sheets of newspaper directly over the grass is an effective and much easier alternative. This smothers the grass, prevents it from growing up into your bed, and breaks down into organic matter over time. If your grass is particularly vigorous kikuyu, for example a double layer of cardboard is worth the extra effort.
Why put cardboard in the bottom of a raised bed?
Cardboard acts as a weed barrier, blocking light and suppressing grass and weeds underneath your bed. It also retains moisture in the early stages and breaks down over six to twelve months, adding organic matter to your soil. Use plain cardboard, remove any tape or staples and avoid glossy printed sections.
How long does it take for cardboard to decompose in a garden bed?
In most NZ conditions, cardboard breaks down within six to twelve months. Moisture accelerates the process and a wet winter will speed things along considerably. By the time it's gone, your soil should be well established enough that weed suppression is less of a concern.
Why put sticks in raised beds?
Sticks, woody prunings, and small branches placed at the base of a raised bed form what's sometimes called a hugelkultur layer. As the wood decomposes it retains moisture, creates air pockets for drainage, and slowly releases nutrients into the soil above. It's a good way to use garden waste productively and bulk out the lower portion of a deep bed without buying extra fill.
Can you just lay compost on top of soil?
Yes, and it's one of the simplest things you can do for an established bed. Spreading a 5–10 cm layer of compost on the surface known as a top dressing improves soil structure, feeds soil organisms, and slowly works its way down with watering and worm activity. You don't need to dig it in. Do this at the start of each season for consistently productive soil.
A well-built raised vege garden can produce fresh food for your family for years. Get the materials right, protect your crops, and you'll spend far more time harvesting than troubleshooting.
Ready to grow? Browse the full range of APT raised garden beds at aptgardencreations.co.nz

Leave a comment
This site is protected by hCaptcha and the hCaptcha Privacy Policy and Terms of Service apply.