A Step-by-step Guide to Spring Planting for Rookies.
Spring is in the air! It’s time to think about spring planting, which we know can be overwhelming when your garden resembles something closer to an overgrown lawn.
If you are one of those people who have the best intentions each spring to plant a garden, make this year your year with our handy tips!
We know all too well the life juggle so we’ve made it easy with a step-by-step guide to rookie vegetable planting that will guarantee greens galore come summer.
Things You Need:
- Spring seedlings of your choice – see below for our picks of easy to grow beginner veges.
- Gardening gloves
- APT Gardening tools – a small fork, trowel, and cultivator for digging seedling holes.
- APT Creations garden box with canopy
- Quality garden soil
- Quality compost (homemade or store bought)
- Sheep and chicken pellets
- Tomato stakes
- Garden labels
- Stake ties
Decide on Your Veges
The fun part! What veges you would you like to grow? Perhaps it should go without saying but you’ll only be buoyed into expert-level gardening if you plant what you’ll eat. Here are our suggestions for fast-growing, easy planting summer veges. The below list is your summer salad sorted.
- Spinach
- Tomatoes
- Chillies
- Basil
- Lettuce
- Radishes
- Spring onions
These are all wonderful beginner plants to get you started. Cherry tomatoes, chillies, and spinach will give you a robust crop throughout the summer months and the goods will keep on coming. Our kids love to eat cherry tomatoes straight from the vine, and the garden smells like summer.
You can pick leaves off your lettuce and spinach as you go. No longer will you have half a bag of spinach wilting away in the back of your fridge, while you hope and wish for someone else to deal with it.
Radishes are fast growing and add a pop of colour to your garden in just 3-7 weeks from planting. Perfect for impatient beginners.
Plant from seedlings for best results. Seeds are another story, for a better gardener if we’re honest.
Prep Your Raised Garden Box
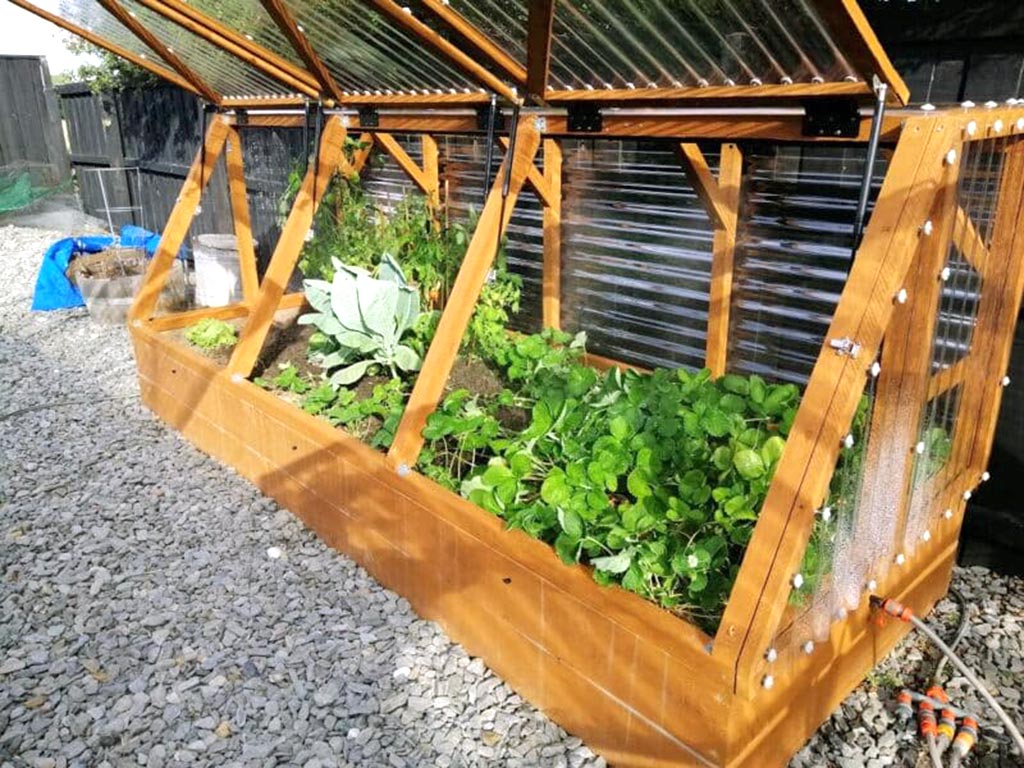
Our raised garden boxes with canopies are perfect for beginners, you can get the full rundown on our raised beds here, but the highlights are:
- They keep out pests (and save your back).
- They are sheltered with a canopy to protect your plant babies from strong winds, thunderstorms, and New Zealand’s harsh elements.
- They include built-in irrigation for easy watering.
If you want the best chance for your green thumb to flourish, use a raised garden box to protect your seedlings from the elements, garden pests, birds, and your pets.
Place your garden box in a nice sunny, sheltered area of your garden. Veges thrive in full sun. Our garden boxes are flat packed with everything you need to put them together including screws.
Fill your garden box with a mix of quality soil and compost. You can buy both from your local Mitre10 or landscaping store. Mix the two together in your garden box and use a garden fork to get air into the soil.
Map and mark out areas where your vegetables will go and plant your seedlings in orderly straight lines, with room between each one so they are not competing for nutrients. A little like this:
Planting Guide
Plant your tomatoes and chillies along the back of your box in a row – they will grow high and outwards, so you want them at the back with plenty of space. Mark out your stakes about 40cm apart. Try a few different varieties out – cherry tomatoes are a rookie’s best friend.
Plant spring onions and radishes at one end of the box – plant each one about 5cm apart. Spring onions are great in the garden as you can just pick one at a time, again reducing vegetable waste in your fridge!
Basil and tomatoes work just as well together in the garden as they do on your plate. They nourish each other so plant basil in front of your tomatoes for optimal growth. Plant 5cm apart.
Plant your spinach at the other end of the box from your spring onions. Spinach can also get quite big so give it some room to grow without breaking the delicate stalks of your spring onions. Plant 5-10cm apart.
Line lettuces in front of your basil for easy picking. Plant 10cm apart.
There you have it, a smart, well-planned out beginner garden.
How to Plant Your Veges
Once your soil is in and you’ve mapped out your plan, time to get planting!
Make small 5-10cm holes in the soil with our stainless steel cultivator. Hold your seedling pots upside down and gently pull out your plants. Shaking gently to loosen up the root ball.
Plant your seedlings and cover them with soil again.
Sprinkle your sheep and chicken pellets over the entire garden for extra nutrients. Water your garden to settle the roots into the soil after a traumatic day of being moved around. And your set!
Keeping Your Plants Alive
Our garden boxes are designed to make gardening simple. The built-in irrigation system will keep your plants watered at a steady rate, simply turn on the tap in the morning or evening for 30 minutes or so and let it do the work for you.
Regularly weed your garden to ensure it’s your plants getting the nutrients and not unwelcome guests. You won’t have to worry about pests with our covered beds.
Continue to tie your tomato and chilli vines gently to your stakes as they grow.
You’ll know your veges are ready to pick when they are roughly the size and colour you see in the supermarket, although they will be a whole lot tastier, fresher, and made from your hands!
Shop Garden Beds
Shop Garden Tools

Leave a comment
This site is protected by hCaptcha and the hCaptcha Privacy Policy and Terms of Service apply.